
Friday, October 31, 2014

Thursday, October 30, 2014
Day Eleven Of 13 Days Of The Carter Couture: Doll Good vs. Bad

Products Used:
Products Used:
- NK Lip Liner in Red
- BH Cosmetics Glamours Blush Palette Color: Red and Pink
- Rubies Cream Makeup in White and Black
- L.A Colors Eye shadow in White
- L.A Girl Pro Eye Primer In White
- NK Eye Liner in Black
- Kleancolor Brow Powder in Brown
- Wet'n Wilds Lip Stick in Red Velvet
- Vampire Blood


Monday, October 27, 2014


Day Six Of 13 Days Of The Carter Couture: Scarecrow

This is a super easy look! Great for a last minute costume idea! I have seen this look everywhere, but I decided to use my flannel as my color inspiration. For this look I used a violet eye liner by Italia Deluxe instead of paint to draw on my design. I drew on my nose which is kind of like a teardrop. Then my cheeks, all you do is draw two circles on your cheeks. For the eyes I did a basic look I was comfortable with and added lashed. For the bottom lashes I used black cream paint, you can use black eyeliner if you want, draw on some dramatic lashes. For my lips I used the same violet eyeliner to line my lips and slightly filled them in, leaving the center bear and used a lip paint by L.A Girl in the color Coy. For the final touches I used the same black paint and drew on my stitches on the nose and mouth. Add a straw hat with your flannel and your ready to go! For an added touch your can add some straw to you look!
This is a super easy look! Great for a last minute costume idea! I have seen this look everywhere, but I decided to use my flannel as my color inspiration. For this look I used a violet eye liner by Italia Deluxe instead of paint to draw on my design. I drew on my nose which is kind of like a teardrop. Then my cheeks, all you do is draw two circles on your cheeks. For the eyes I did a basic look I was comfortable with and added lashed. For the bottom lashes I used black cream paint, you can use black eyeliner if you want, draw on some dramatic lashes. For my lips I used the same violet eyeliner to line my lips and slightly filled them in, leaving the center bear and used a lip paint by L.A Girl in the color Coy. For the final touches I used the same black paint and drew on my stitches on the nose and mouth. Add a straw hat with your flannel and your ready to go! For an added touch your can add some straw to you look!

Thursday, October 23, 2014
Day Four Of 13 Days Of The Carter Couture:
Clown!
.jpg)
For this Clown Look I opted out to do a white face and used a light foundation and set it with a white eye shadow. For the Colors I used a Blue, Green, Red, Black And white cream makeup. For the pink cheeks I mixed the red and white until the color was as light as I wanted. As for the design, there are so many different clown inspirations out there and if you do a clown I say go for it and have fun! I did not use any inspiration photos, I just did the basics we all know and LOVE about clowns and went from there. I used just a regular brown to shade the teeth along with a bright yellow from the Take Me To Brazil by BH Cosmetics. For my chest I used the blue and black cream paint and made a clown collar with some white dots on one side.
Clown!
For this Clown Look I opted out to do a white face and used a light foundation and set it with a white eye shadow. For the Colors I used a Blue, Green, Red, Black And white cream makeup. For the pink cheeks I mixed the red and white until the color was as light as I wanted. As for the design, there are so many different clown inspirations out there and if you do a clown I say go for it and have fun! I did not use any inspiration photos, I just did the basics we all know and LOVE about clowns and went from there. I used just a regular brown to shade the teeth along with a bright yellow from the Take Me To Brazil by BH Cosmetics. For my chest I used the blue and black cream paint and made a clown collar with some white dots on one side.

Day Two Of 13 Days Of The Carter Couture: Sugar Skull

Using my baby sister I did a sugar skull. I looked at several photos of different takes on a sugar skull and this is my version. I was inspired by a blue skull I seen and decided to use blue as my primary color, that and black. I did not want to paint the face white so I opted to use a very light foundation. It only took a few products and they are black cream makeup, a color tattoo in the shade 40 Tenacious teal and you want a powder or eye shadow to set it and I used L.A Colors eye shadow in Periwinkle. The lashes used are by Wet n' Wild and the small stars/flower gems on the face are actually nail decals in a dark and baby blue. As far as the design goes, I just went with it. You can use photos or this photo as inspiration. Just go with it and see how it turns out! Check us out on Instagram @thecartercouture and if you redo this look #thecartercouture.
Using my baby sister I did a sugar skull. I looked at several photos of different takes on a sugar skull and this is my version. I was inspired by a blue skull I seen and decided to use blue as my primary color, that and black. I did not want to paint the face white so I opted to use a very light foundation. It only took a few products and they are black cream makeup, a color tattoo in the shade 40 Tenacious teal and you want a powder or eye shadow to set it and I used L.A Colors eye shadow in Periwinkle. The lashes used are by Wet n' Wild and the small stars/flower gems on the face are actually nail decals in a dark and baby blue. As far as the design goes, I just went with it. You can use photos or this photo as inspiration. Just go with it and see how it turns out! Check us out on Instagram @thecartercouture and if you redo this look #thecartercouture.
Monday, October 20, 2014
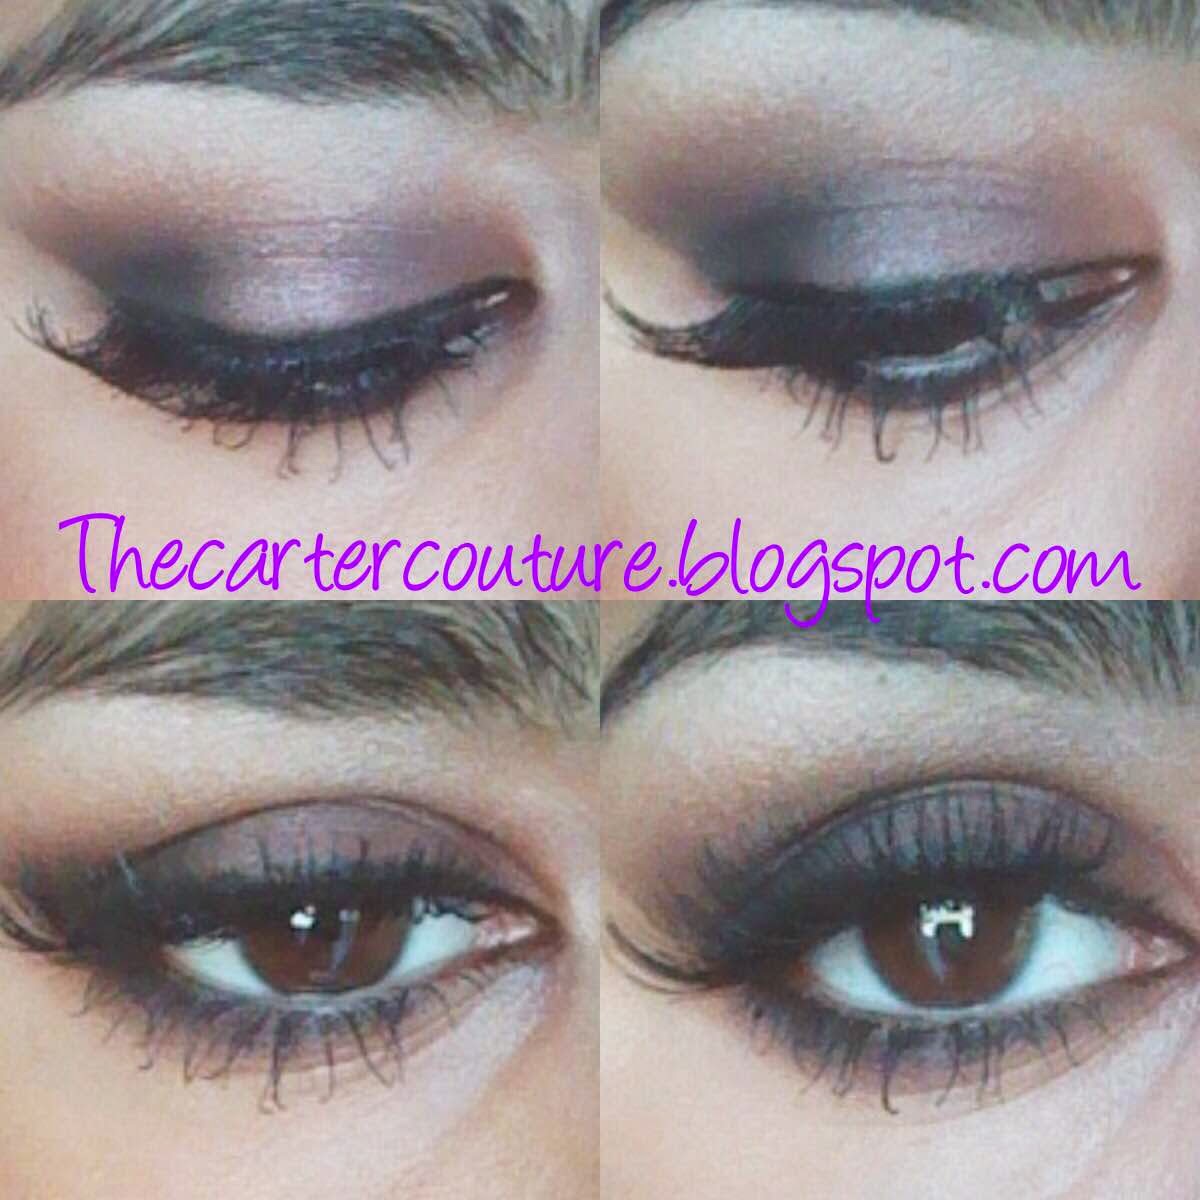
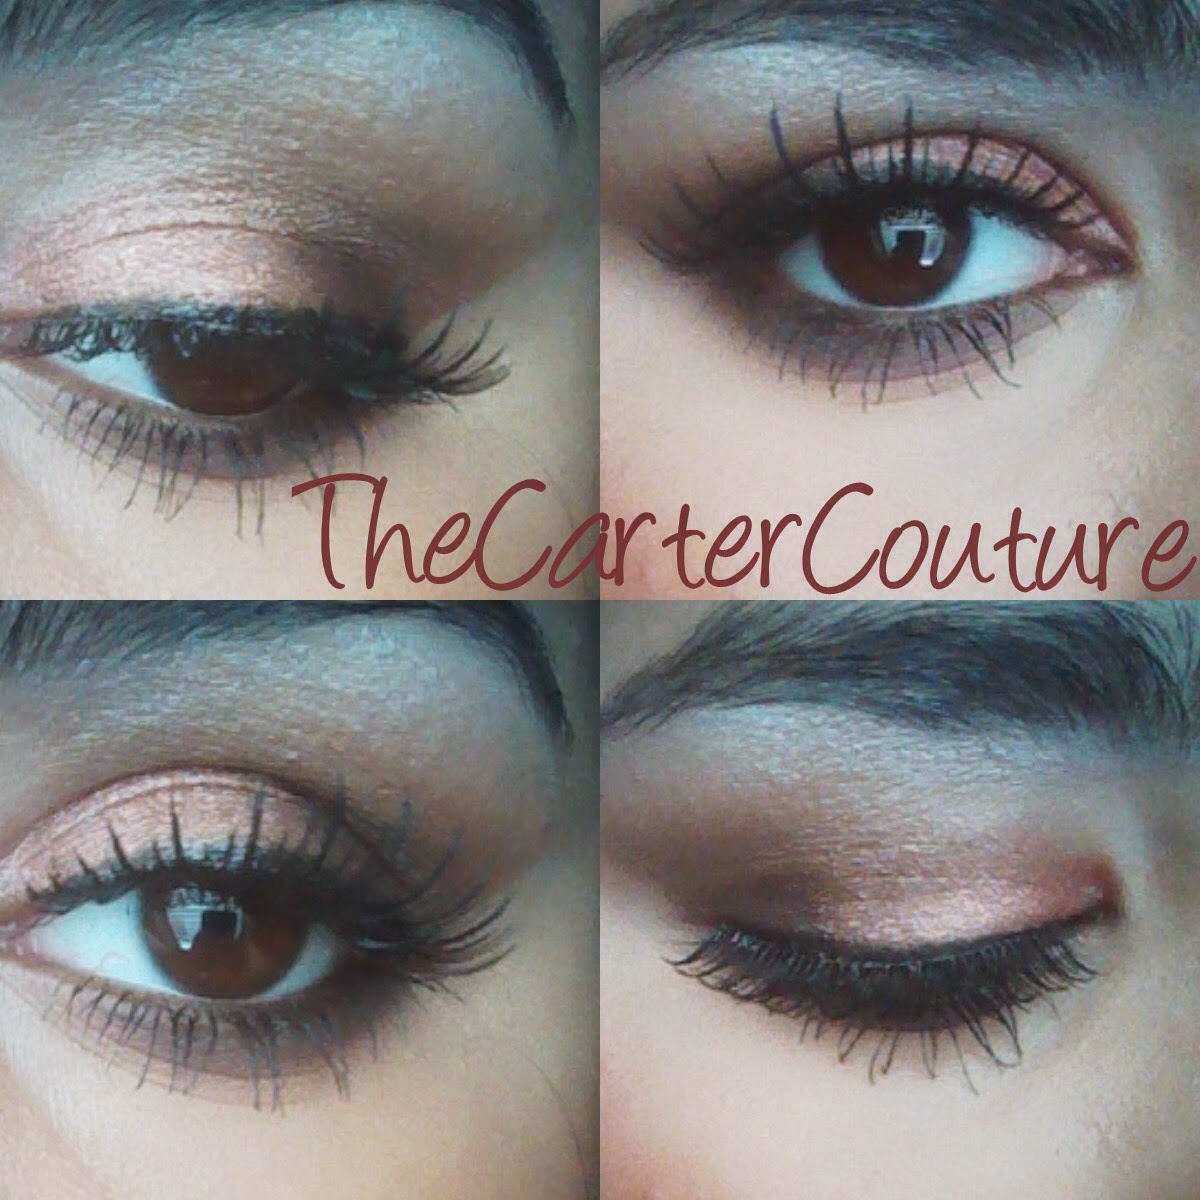
Day One Of 13 Days Of The Carter Couture: Cheetah Eyes!

Cheetah Eyes!
For these cheetah eyes I was inspired by the color purple (which happens to be my favorite color) and cheetah print. For this look I took an old look of mine and gave it a new twist. For this look I used one one palette the entire time which was the BH Cosmetics Take Me To Brazil Palette. This palette had all the colors you could need, but you can use any purple shadows to do the same effect. Just be sure to have at least three from lightest to darkest. This helps add to the colors and make the eye pop. My gel liner I used was also BH and it is in the color Onyx. The purple liner I use is by Italia Deluxe in the color violet. My eye primer was LA Girl pro primer in white. The lashes I used I purchased last year, they came in a vampire makeup kit. I have seen the same kit still being sold at Wal Mart's. I actually would not recommend theses lashes that are very stiff and long. Making them hard to get on your eyes and stay on.
Here Are The Steps:
- To start this look off I used a white primer by La Girl. I used white so that all the colors will pop.
- Once my base was done I used a dark purple shadow from the BH palette and added that as my crease color as well as my transition color.
- I look the next purple which is a little and more pink based and added that to the crease as well.
- For my lid I took the shimmery baby purple and put that all over the lid. I added some of the first purple to the outer v of my eye and blended that out and then took the black from the palette and added that to the outer v as well to add a little depth.
- From here I lined my eyes with my black gel liner. I did the liner as usual, but I took the a little further out on the inner corner of my eyes. I also set my liner with the black shadow.
- For my water line and bottom lash line I used that purple liner and put that in my water line and ran it on my bottom lash line as well. I set everything with the purples from the palette and also smudged lower lash line out a bit for a dramatic look. I also decided to extend the purple liner to meet the end of my black liner, this is optional.
- I always do this almost last, but I took my white shadow from the palette and highlight my brow bone.
- Before adding lashes and mascara I use a liquid liner and drew on my cheetah print. I drew them like half C’s.
- One the liner dried I added the liquid glitter I had to the inside of each print.
- Now you can add your mascara and lashed.
- The lashes I use were a bit dramatic, but you can always use normal lashes or any lashes you please.
- And There You Go!

Friday, October 10, 2014

Vampy Lips!
So for these truly vampy lips you can do the lips two ways. If you like you don't have to add the teeth and just go for a fall vampy lip, but if this is a Halloween look I say go for it and add the teeth! All I needed was a few things. I wanted to recreate a look I seen on Pinterest so I tried to stay true to the colors, but you can use any colors you like. I used a black, dark purple, and a red lipstick to create the ombre effect. I also used a black eyeliner to create a crisp lip line and a shimmery gloss to add that extra effect. For the teeth I used cream face paint that you can find everywhere for a dollar. All my lip products are Wet n Wild including the black eyeliner pencil.
Additional items I would recommend is a lip brush to help blend the colors as well as line your lips.
Here Are The Steps:
- For this look I used the black lipstick and the lip brush to line my lips. I lined my natural lips and blended the black down one third of the way down my top lip and did the same to the bottom.
- After this I added the dark purple and blended it into the black and down, but still left the inner part of my lips bare.
- From there I added the red to the center and blended the red to the purple.
- After that I went over my lips with the liner and relined my lips. I also blended any harsh lines that I may have left. You can leave the lip there and have a nice matte lip or take it a little further.
- Once my lips were the way I wanted I painted the vampire teeth on, using my natural teeth as a guide. once they dry I added one more coat to have the teeth be as white as possible.
- This step is optional but I added some gloss I had on hand. I made sure to not blend the gloss over the teeth. Otherwise you will have a mess.
- An extra tip is you can go around the edges of your lips with a concealer to make them extra crisp, also helps if your lines are not what you wanted.
- Now you have vampy lips.

Subscribe to:
Comments (Atom)